Welcome to a world of indulgence where the rich, decadent flavors of chocolate meet the natural sweetness of ripe bananas. If you’re on the hunt for a delightful dessert that not only satisfies your sweet tooth but also brings joy to any occasion, look no further. The Choco-Banana Bliss Bars are an easy-to-make treat that’s perfect for family gatherings, a quick snack for kids, or simply a sweet indulgence for yourself after a long day.
The Joy of Homemade Desserts
There’s something uniquely satisfying about creating homemade desserts. The process of baking not only fills your kitchen with wonderful aromas but also brings a sense of accomplishment. With each step, you’ll find joy in mixing, pouring, and ultimately tasting the fruits of your labor. Using ripe bananas in this recipe not only enhances the flavor but also contributes to the overall moistness of the bars. As you embark on this baking journey, you’ll discover that these Choco-Banana Bliss Bars are not just about satisfying cravings; they’re about creating memories, sharing love, and enjoying the sweet moments life has to offer.
Understanding the Ingredients
Each ingredient in the Choco-Banana Bliss Bars has been carefully selected to create a harmonious blend of flavors and textures. Here’s a detailed look at what goes into these delightful bars and how each component contributes to their mouthwatering goodness.
Ripe Bananas
At the heart of this recipe are the ripe bananas. Choosing bananas that are perfectly ripe is essential, as they provide natural sweetness and moisture that transforms these bars into a luscious treat. Ripe bananas not only enhance the flavor profile but also ensure a tender, soft texture. When bananas reach that ideal ripeness, their starches convert into sugars, making them sweeter and more flavorful. This inherent sweetness allows for a reduction in added sugars, making your dessert a little more wholesome.
Unsalted Butter
When it comes to baking, using unsalted butter is the golden rule for many bakers. The reason behind this preference is simple: unsalted butter allows for better control over the overall salt content of the recipe. By using unsalted butter, you can decide how much salt to include, ensuring that the flavors of your Choco-Banana Bliss Bars are perfectly balanced. The rich, creamy texture of the butter also contributes to the moistness of the bars, giving them that melt-in-your-mouth quality we all crave.
Brown Sugar
Brown sugar plays a pivotal role in the flavor and texture of these bars. Its molasses content adds a deep, caramel-like flavor that enhances the overall sweetness of the dessert. Additionally, brown sugar has a higher moisture content compared to white sugar, which helps keep the bars chewy rather than dry. This chewy texture is one of the hallmarks of a great dessert, making each bite satisfying and enjoyable.
Eggs
Eggs are another key ingredient, serving multiple functions in the Choco-Banana Bliss Bars. They act as a binding agent, holding all the ingredients together and providing structure to the bars. The protein in eggs helps create a firm yet tender texture, while also contributing to the overall richness of the dessert. When combined with the other ingredients, eggs ensure that the bars rise properly and have the right consistency.
Vanilla Extract
A splash of vanilla extract elevates the flavor profile of these bars, adding a warm and aromatic undertone that complements the chocolate and bananas beautifully. Vanilla is a classic flavor enhancer in baking, and its presence can transform a good dessert into a great one. The fragrant notes of vanilla work in harmony with the other ingredients, creating a cohesive and delightful taste experience.
All-Purpose Flour
Flour is the backbone of any baked good, and it provides the necessary structure for the Choco-Banana Bliss Bars. All-purpose flour is versatile and ideal for baking, as it has the perfect balance of protein and starch to yield a tender crumb. It absorbs moisture from the wet ingredients and helps create the bars’ desirable texture. The right amount of flour ensures that the bars hold together well without being too dense or too airy.
Baking Soda and Salt
Baking soda is a leavening agent that plays a crucial role in helping the bars rise during baking. It reacts with the acidic components in the recipe, creating gas bubbles that expand and lighten the texture. A pinch of salt is equally important; it balances the sweetness and enhances the overall flavor, making every bite more satisfying. Together, baking soda and salt create the ideal conditions for the Choco-Banana Bliss Bars to bake to perfection.
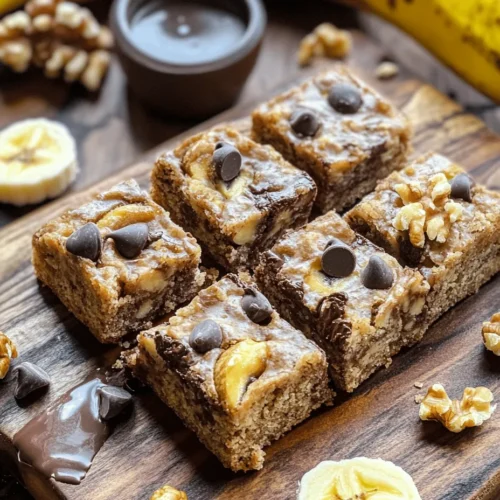
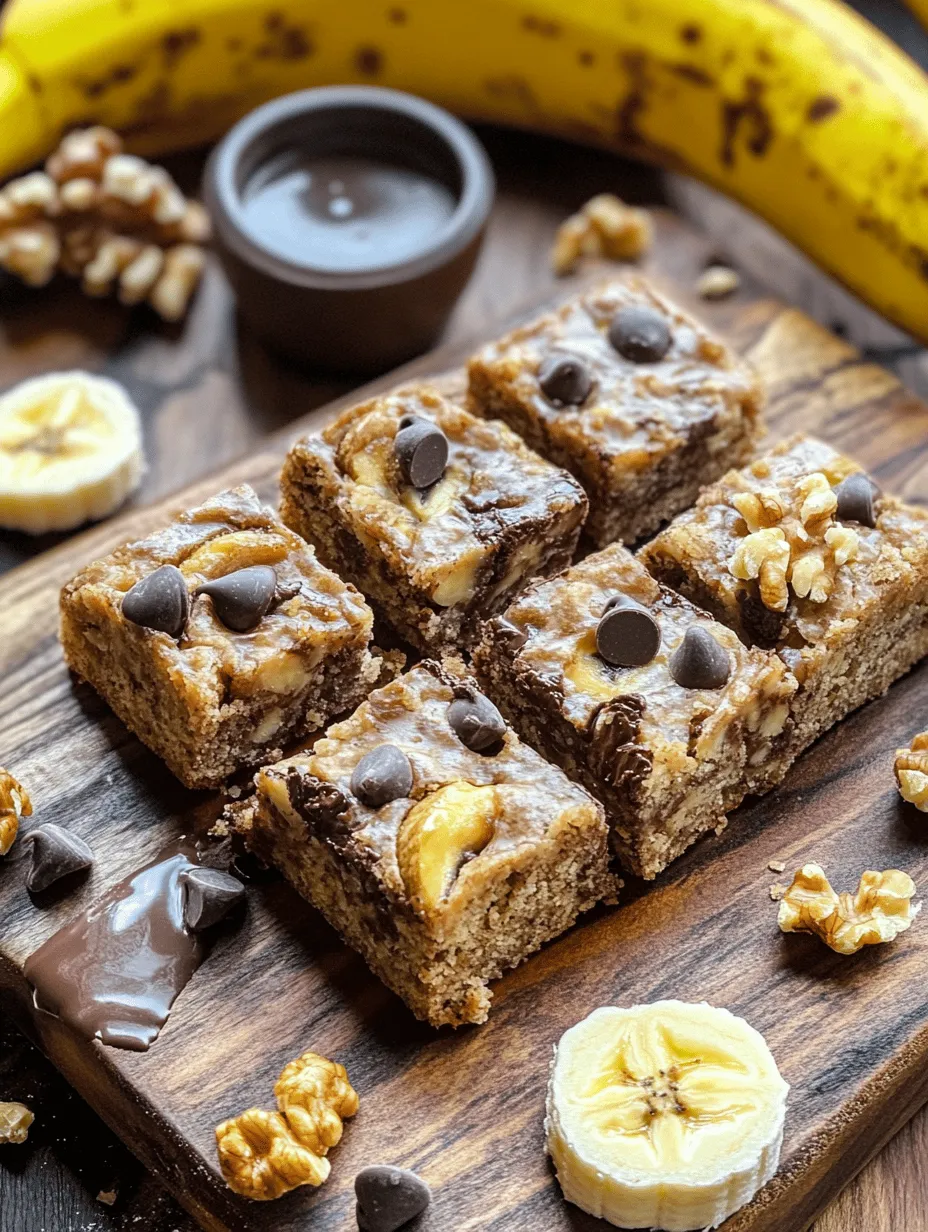
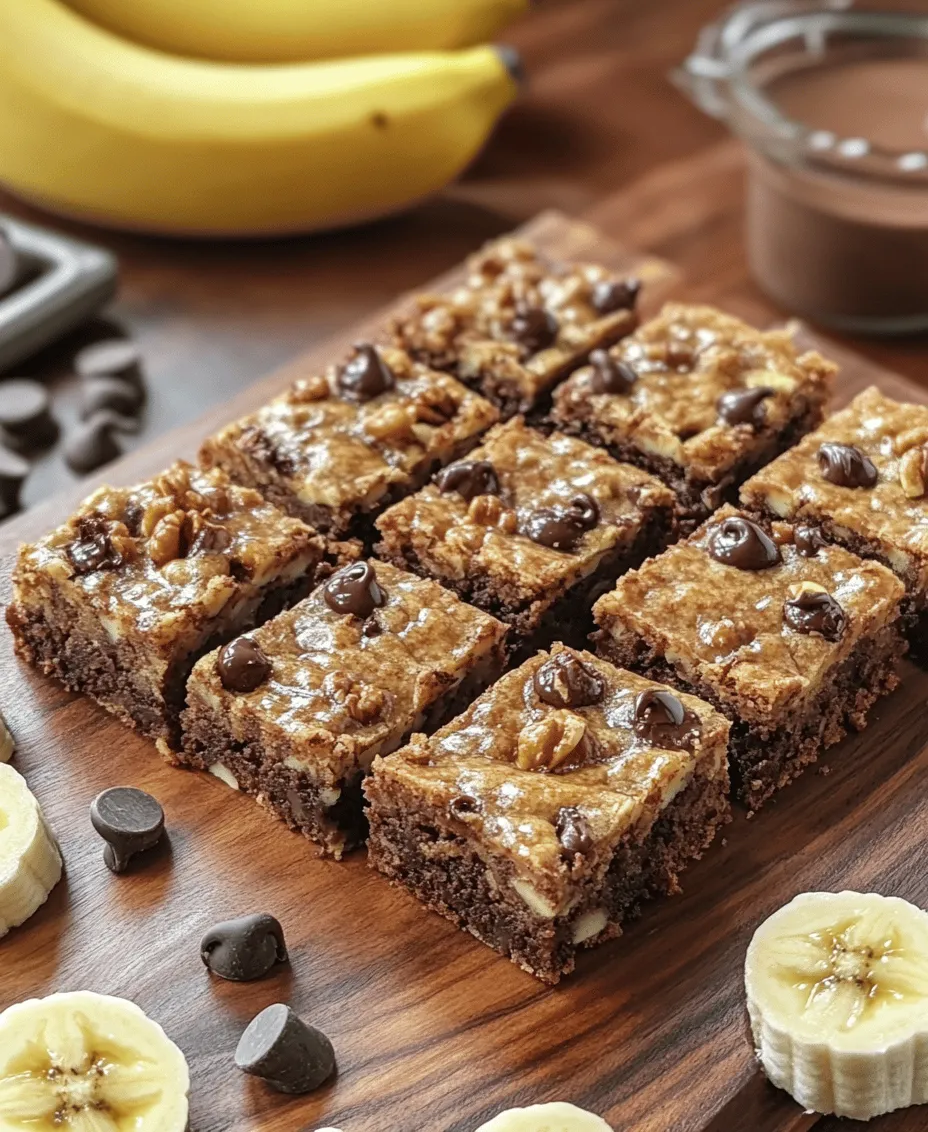
Chocolate Chips
No Choco-Banana Bliss Bars would be complete without the addition of chocolate chips. These morsels provide delightful bursts of chocolate flavor throughout the bars, ensuring that each bite is a sweet surprise. Whether you prefer semi-sweet, dark, or even milk chocolate chips, the choice is yours, and each type will impart a unique flavor to the final product. Chocolate chips melt slightly during baking, creating gooey pockets of chocolate that elevate the dessert to a whole new level.
Walnuts (Optional)
While walnuts are an optional ingredient in this recipe, they add both texture and nutritional value. Chopped walnuts provide a satisfying crunch that contrasts beautifully with the softness of the bars, enhancing the overall eating experience. They also introduce healthy fats, protein, and essential nutrients, making your dessert a tad more nutritious. If you’re a fan of nuts, feel free to toss in a handful for added flavor and texture.
Preparation Steps
Now that you’re familiar with the ingredients, let’s dive into the preparation process. Don’t worry; these steps are straightforward and easy to follow, making them perfect for novice bakers and seasoned pros alike.
Preheating the Oven
The first step in your baking adventure is to preheat the oven to the ideal temperature for baking the Choco-Banana Bliss Bars. Preheating is crucial because it ensures that your bars bake evenly and achieve the perfect texture. Set your oven to 350°F (175°C) and allow it to preheat fully before you place the bars inside. This step is essential for achieving that golden-brown exterior and soft, chewy interior that we all love.
Mixing Wet Ingredients
While the oven is preheating, you can start preparing the wet ingredients. Begin by peeling and mashing the ripe bananas in a mixing bowl. You’re looking for a smooth consistency, so use a fork or a potato masher to break down the bananas effectively. Once mashed, melt your unsalted butter and add it to the bowl with the bananas.
Next, incorporate the brown sugar, eggs, and vanilla extract. Thoroughly mix these ingredients until they are well combined; the mixture should be smooth and slightly glossy. The combination of melted butter and ripe bananas creates a luscious base that will make your bars incredibly moist. Make sure to mix well, as this ensures that all flavors meld beautifully, making for a delightful final product.
As you progress with the recipe, you’ll find that these initial steps are straightforward and set the foundation for creating your Choco-Banana Bliss Bars. The blend of ripe bananas, butter, and sugar creates a fragrant mixture that will soon become a household favorite.
Stay tuned for the next part, where we’ll delve into the remaining steps of preparing these delightful bars, including mixing the dry ingredients and baking them to perfection!
Combining Dry Ingredients
When it comes to baking Choco-Banana Bliss Bars, the first step in ensuring a well-balanced treat is to combine the dry ingredients thoroughly. Begin by whisking together the flour, baking soda, and salt in a medium bowl. The significance of this step cannot be overstated; whisking helps to aerate the flour, ensuring that there are no lumps and that the baking soda and salt are evenly distributed throughout the mixture. This even distribution is crucial because it guarantees that your bars will rise uniformly and be seasoned just right.
If the baking soda is concentrated in one area, it can lead to uneven rising, resulting in a dense and unappetizing texture. Additionally, the salt enhances the flavors of the bananas and chocolate, making it vital for a balanced taste. So, take a moment to whisk these ingredients until they are well combined, setting the foundation for your Choco-Banana Bliss Bars.
Merging Wet and Dry Mixtures
Next, it’s time to merge the wet and dry mixtures, a step that requires a gentle touch. In a large bowl, combine your mashed bananas, melted coconut oil (or butter), brown sugar, and vanilla extract until smooth. Once this wet mixture is ready, create a well in the center of the dry ingredients and pour the wet mixture into it.
Instead of stirring vigorously, which can lead to overmixing and result in tough bars, use a gentle folding technique. Employ a spatula or wooden spoon to carefully mix the ingredients together. The goal here is to combine them just until you see no dry flour remaining. Overmixing can activate the gluten in the flour, resulting in a denser bar rather than the light, tender texture we aim for. Remember, a few lumps are perfectly fine; they will bake out and leave you with delightful bars.
Incorporating Mix-Ins
Now comes the fun part—incorporating the chocolate chips and walnuts. These mix-ins not only add flavor but also a delightful texture to your bars. Gently fold in the chocolate chips and walnuts with the same care you used to combine the wet and dry ingredients. Aim to distribute them evenly throughout the batter without overmixing. This step is essential because it ensures that each bite of your Choco-Banana Bliss Bars is filled with rich chocolatey goodness and the crunch of walnuts.
If you prefer, you can customize your mix-ins by substituting walnuts with pecans or adding dried fruits like cranberries or raisins. The key is to maintain a balance so that the batter isn’t overwhelmed by too many ingredients.
Baking Process
With all your ingredients combined, it’s time to bake! Preheat your oven to 350°F (175°C) and line an 8×8-inch baking pan with parchment paper, leaving some overhang for easy removal later. Pour the batter into the prepared pan, using a spatula to spread it evenly into the corners and smoothing the top.
Baking times can vary, but generally, your Choco-Banana Bliss Bars will need about 25-30 minutes in the oven. Keep an eye on them as they bake, and around the 25-minute mark, begin checking for doneness. The edges should look firm and slightly golden, while the center should spring back when gently pressed.
Baking Tips for Perfect Choco-Banana Bliss Bars
To ensure that your Choco-Banana Bliss Bars turn out perfectly, here are some helpful baking tips:
– Checking for Doneness: The toothpick test is a reliable method to check if your bars are done. Insert a toothpick into the center of the bars; it should come out clean or with a few moist crumbs attached. If wet batter clings to the toothpick, return the pan to the oven for a few more minutes.
– Cooling Process: Once baked, allow the bars to cool in the pan for about 10-15 minutes. This cooling period is crucial as it helps the bars firm up, making them easier to cut. Afterward, lift the bars out of the pan using the parchment overhang and transfer them to a wire rack to cool completely. This step also enhances the flavor, allowing the bars to settle into their perfect texture.
– Cutting and Serving: When it comes time to cut your cooled bars, use a sharp knife for clean edges. For uniformity, you can use a ruler to mark where you want to cut, ensuring each square is evenly sized. These bars are perfect for serving at gatherings, packed as snacks for lunches, or enjoyed as a delightful treat after dinner.
Nutritional Information
Understanding the nutritional content of your Choco-Banana Bliss Bars can help you appreciate their health benefits. Each bar contains approximately:
– Calories: 150-180
– Total Fat: 7-9g (healthy fats from walnuts and coconut oil)
– Carbohydrates: 22-24g
– Protein: 2-3g
– Fiber: 2-3g
The bananas provide natural sweetness and are a great source of potassium and vitamin C, while walnuts contribute omega-3 fatty acids and antioxidants. The combination of these ingredients creates a nutritious snack that satisfies both sweet cravings and health-conscious choices.
Variations and Customizations
One of the best aspects of Choco-Banana Bliss Bars is their versatility. Here are some ideas to customize the recipe to fit your taste or dietary needs:
– Nut-Free Options: For those with nut allergies, you can simply omit the walnuts or replace them with sunflower seeds or pumpkin seeds for added crunch without the allergens.
– Flavor Enhancements: A sprinkle of cinnamon or nutmeg can elevate the flavor profile of your bars. Consider adding a teaspoon of either spice to the dry ingredients to introduce a warm, comforting note.
– Non-Dairy Alternatives: If you’re looking for a dairy-free version, use coconut oil or a plant-based butter substitute. Additionally, you can choose dairy-free chocolate chips to keep the recipe entirely free of animal products.
Conclusion
Creating homemade Choco-Banana Bliss Bars is a rewarding experience that combines simplicity with delightful flavors. These bars are not just a treat; they represent a wholesome way to enjoy the natural sweetness of bananas and the richness of chocolate. Their versatility allows you to experiment with flavors and ingredients, making the recipe your own.
Whether you’re sharing them with friends and family or enjoying them as a solo snack, these bars bring joy to any occasion. With easy-to-follow steps and a few customizable options, you’ll find that the process of baking is just as enjoyable as the treat itself. So gather your ingredients, preheat that oven, and get ready to indulge in the deliciousness of your Choco-Banana Bliss Bars!