

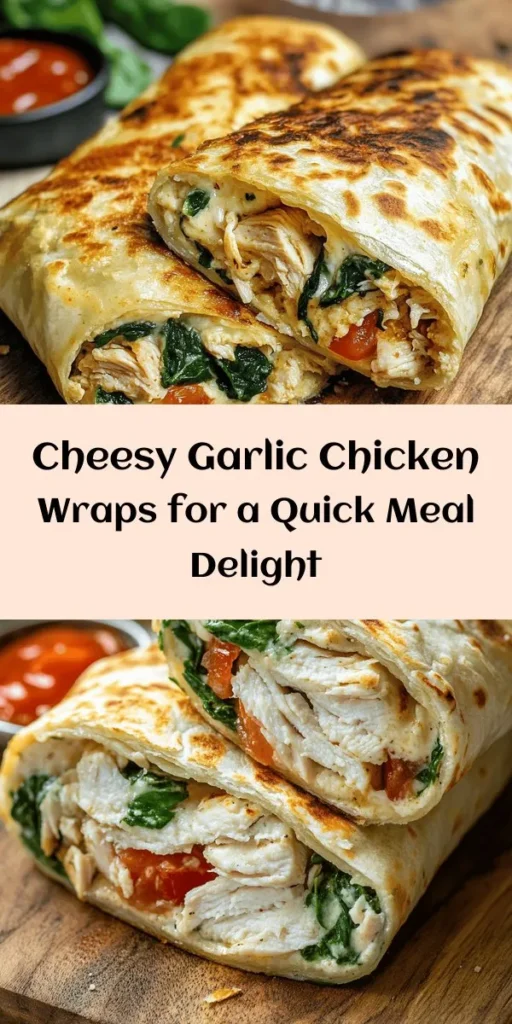
In the fast-paced world we live in, finding a meal that is both satisfying and convenient can often feel like a daunting task. Enter the Cheesy Garlic Chicken Wraps—a delicious solution that ticks all the boxes for a quick yet flavorful meal. These wraps are perfect for lunch, dinner, or even as a hearty snack. They beautifully combine creamy textures with savory flavors, making them an appealing choice for any time of the day.
The versatility of wraps is one of their most significant advantages. They can accommodate a wide range of ingredients, making them suitable for various dietary preferences and occasions. Whether you are a busy professional looking for a quick lunch option or a parent wanting to whip up something nutritious for the family, these Cheesy Garlic Chicken Wraps are a fabulous choice. They can be made in advance, stored in the refrigerator, and enjoyed whenever hunger strikes, making meal prep a breeze.
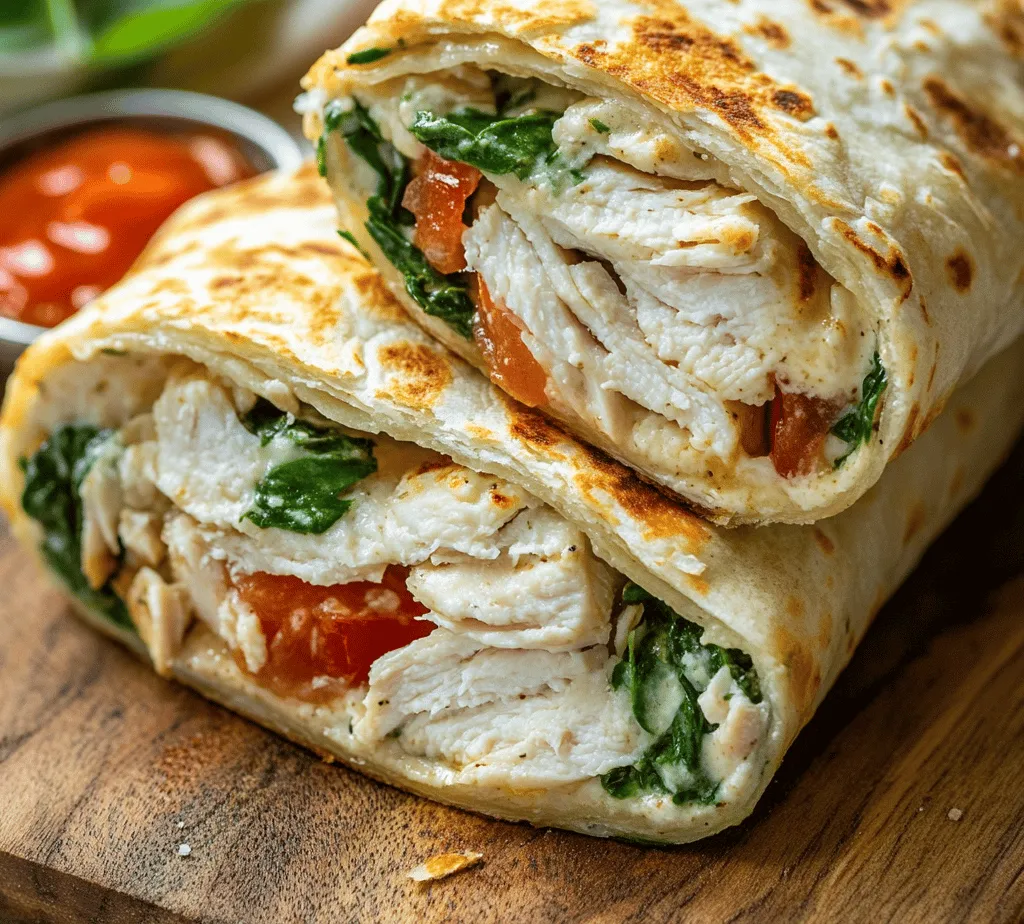
The delightful taste of these wraps is not just about convenience; it’s about the explosion of flavors you’ll experience with every bite. The combination of cooked chicken, rich cheeses, and savory garlic, accompanied by fresh vegetables, creates a balanced meal that is both satisfying and delicious. Plus, the ease of preparation means that you can create a gourmet experience right in your kitchen without spending hours slaving over the stove.
Let’s dive into understanding the ingredients that make these Cheesy Garlic Chicken Wraps so irresistible.
Understanding the Ingredients
To create the perfect Cheesy Garlic Chicken Wraps, it’s essential to understand the role of each ingredient in this delicious recipe. Each component contributes to the overall flavor and texture, ensuring that the final product is nothing short of delightful.
Highlighting Cooked Chicken
At the heart of these wraps is the cooked chicken. Using cooked chicken not only saves time but also brings a depth of flavor that is crucial for the wraps. There are several convenient options for sourcing your chicken. Rotisserie chicken from the grocery store is an excellent choice; it’s pre-cooked, flavorful, and can be shredded quickly for use in the wraps. Alternatively, if you prefer to meal prep, you can cook chicken breast using your favorite method—grilling, baking, or poaching—and shred it for this recipe. No matter which option you choose, the chicken serves as a protein-packed base that keeps the wraps hearty and satisfying.
The Role of Cheese
Cheese plays a vital role in the Cheesy Garlic Chicken Wraps, contributing both creaminess and richness. For this recipe, a combination of mozzarella and cream cheese is used. Mozzarella adds a mild flavor and delightful stretchiness when melted, making each bite deliciously gooey. On the other hand, cream cheese brings an indulgent creaminess that binds all the ingredients together. The result is a luscious filling that elevates the wrap from simple to sublime.
Garlic Powder and Olive Oil
Garlic is a foundational flavor in many savory dishes, and in this recipe, garlic powder is used to infuse the wraps with a robust taste. Its concentrated flavor elevates the overall profile of the dish, ensuring that each bite is packed with that beloved garlic goodness. Complementing the garlic is olive oil, which adds moisture to the mixture and enhances the cooking process. Olive oil is not only beneficial for its flavor but also for its health properties, making it a great addition to these wraps.
Fresh Vegetables
To balance out the richness of the chicken and cheeses, fresh vegetables are included. Spinach and tomatoes are the stars of this wrap, providing not only color but also nutritional benefits. Spinach is a powerhouse of vitamins and minerals, including iron and vitamin K, while tomatoes add freshness and a touch of acidity that brightens the dish. Together, they create a well-rounded meal that is as nutritious as it is delicious.
Seasonings and Spices
Finally, the use of seasonings and spices can make or break a dish. In this recipe, Italian seasoning, salt, and pepper are added to enhance the flavor profile of the wraps. Italian seasoning brings a blend of herbs that complement the chicken and vegetables, while salt and pepper elevate all the flavors, ensuring a balanced and flavorful filling.
Preparation Process
Now that we have a solid understanding of the ingredients, let’s dive into the preparation process for these Cheesy Garlic Chicken Wraps. Each step is designed to ensure that the wraps turn out perfectly, with a deliciously creamy filling and an easy-to-handle tortilla.
Creating the Chicken Mixture
The first step in the preparation process involves creating the chicken mixture that will serve as the filling for the wraps. Begin by shredding your cooked chicken into bite-sized pieces. If you’re using rotisserie chicken, this should be a quick and easy task. In a mixing bowl, combine the shredded chicken with the mozzarella and cream cheese. It’s essential to allow the cream cheese to soften at room temperature before mixing; this will help achieve a creamy consistency that binds the chicken and cheese together seamlessly.
Next, add in the garlic powder, a dash of olive oil, and the Italian seasoning, salt, and pepper to the bowl. Stir the mixture thoroughly until all ingredients are well combined. The goal is to achieve a creamy, flavorful filling that is evenly seasoned. This mixture should be packed with flavor and have a delightful texture, making it the star of the wraps.
Warming the Tortillas
Once your chicken mixture is ready, it’s time to prepare the tortillas. Warming the tortillas is a crucial step that enhances their pliability—making the assembly of the wraps much easier. You can warm the tortillas either in a dry skillet over medium heat for about 30 seconds on each side or wrap them in a damp paper towel and microwave them for about 15-20 seconds. The idea is to make them soft enough to fold without cracking.
If you prefer a bit of extra flavor, consider brushing the tortillas lightly with olive oil before warming them. This adds a hint of richness and helps in achieving a lovely golden color when they are finally cooked.
Assembling the Wraps
Now that both your chicken mixture and tortillas are ready, it’s time for the fun part—assembling the wraps! Lay a warm tortilla flat on a clean surface. Spoon a generous amount of the chicken mixture onto the center of the tortilla, making sure not to overfill it. Leaving enough space on the edges will ensure that you can roll the wrap easily without spilling the filling.
To roll the wraps, start by folding the sides of the tortilla over the filling, then tuck the edge closest to you over the filling and roll tightly. Make sure to roll it snugly to prevent it from falling apart during cooking. Once you’ve rolled the wrap, you can place it seam-side down on a plate to hold its shape.
Now that you have your wraps assembled, you’re almost ready to enjoy this delicious meal. Stay tuned for the next part of this article, where we will cover the cooking process to achieve that perfectly golden and crispy exterior that makes these Cheesy Garlic Chicken Wraps irresistible.
The blend of creamy chicken, melted cheese, and fresh vegetables, all wrapped up in a warm tortilla, promises a meal that is not only easy to prepare but also bursts with flavor. With each bite, you’ll savor the delightful combination of textures and tastes, making it a dish you’ll want to revisit time and time again.
Portioning the Filling and Layering Ingredients Effectively
When making Cheesy Garlic Chicken Wraps, achieving the perfect balance of flavors and textures starts with proper portioning and layering of the filling. To ensure that every bite is packed with deliciousness, follow these guidelines:
1. Measure the Chicken: After cooking and shredding the chicken, aim for about 1/2 cup of the shredded chicken per wrap. This amount allows for a hearty filling without overwhelming the wrap itself.
2. Add Vegetables: If you’re using fresh vegetables like spinach or tomatoes, add about 1/4 cup of each per wrap. This not only enhances the flavor but also adds nutrients and crunch.
3. Cheese Layering: For the cheese, about 1/4 cup of shredded cheese should suffice. Opt for a blend that melts well, like mozzarella or cheddar, to ensure a gooey, satisfying consistency.
4. Wrap It Right: When layering, place the chicken at the center of the wrap, followed by vegetables, and then sprinkle the cheese on top. This order ensures that the cheese melts perfectly over the other ingredients, creating a cohesive filling that holds together when you bite into the wrap.
5. Avoid Overstuffing: While it can be tempting to fill the wraps to the brim, it’s important to leave a little space around the edges. This will make folding easier and prevent any filling from spilling out during cooking.
Cooking the Wraps to Perfection
Cooking the wraps properly is crucial to achieving that ideal combination of crispy exterior and gooey filling. Here’s how to do it:
1. Preheat the Skillet: Start by heating a non-stick skillet over medium heat. A well-heated skillet is essential for achieving that golden, crispy finish.
2. Oil the Skillet: Add a tablespoon of olive oil or butter to the skillet. This will not only prevent sticking but also contribute to a beautiful browning of the wrap.
3. Cook the Wraps: Place the wraps seam-side down in the skillet. Cook for about 3-4 minutes or until the bottom turns a golden brown. Flip the wraps carefully, using a spatula to avoid any spillage. Cook the other side for another 3-4 minutes.
4. Monitor the Heat: If the wraps are browning too quickly, reduce the heat slightly. You want to ensure the inside is heated through and the cheese is melted without burning the outer layer.
5. Check for Doneness: Once both sides are golden and the cheese is melted, remove the wraps from the skillet. Allow them to cool for a minute before slicing in half, which will make for an easy serving.
Serving Suggestions
Cheesy Garlic Chicken Wraps are versatile and can be enjoyed in various ways. Here are several ideas to enhance their appeal:
– Plating: Serve the wraps on a platter, garnished with fresh herbs like parsley or cilantro for a pop of color. This presentation elevates the dining experience.
– Sides: Pair your wraps with a crisp salad, such as a Caesar or garden salad. The freshness of the salad complements the richness of the wraps, creating a well-rounded meal.
– Chips or Vegetable Sticks: For a crunch factor, serve alongside tortilla chips or vegetable sticks like carrots and cucumbers. These provide a nice contrast in texture and add to the overall enjoyment.
Dipping Sauces
Adding a dipping sauce can take your Cheesy Garlic Chicken Wraps to the next level. Here are a few suggestions:
– Ranch Dressing: A classic choice, ranch dressing adds a creamy, tangy note that pairs nicely with the savory wraps.
– Salsa: For those who enjoy a bit of spice, fresh salsa is an excellent option. The acidity from the tomatoes serves to balance the richness of the cheese and chicken.
– Homemade Garlic Aioli: Whip up a quick garlic aioli by mixing mayonnaise with minced garlic, lemon juice, and a pinch of salt. This creamy dip enhances the garlic flavor, making each bite even more delightful.
Customization Options
Encouraging readers to personalize their wraps can lead to exciting variations of this recipe. Here are some customization ideas:
– Add Avocado: For a creamy texture, slices of ripe avocado can be added to the filling. This not only enhances flavor but also boosts the nutritional profile.
– Peppers: Roasted or grilled bell peppers add sweetness and depth to the wraps. Consider using a mix of colors for a vibrant presentation.
– Different Cheeses: Experimenting with different types of cheese can also yield delicious results. Try pepper jack for a kick or feta for a tangy twist.
Nutritional Benefits
Cheesy Garlic Chicken Wraps not only satisfy cravings but also offer several nutritional benefits:
Protein Content
The primary ingredient, chicken, is an excellent source of lean protein, making these wraps a fulfilling meal option. Protein is essential for muscle repair and growth, and it helps keep you feeling satisfied longer. With the addition of cheese, the protein content increases further, making this dish a great post-workout meal or a hearty lunch.
Vitamins and Minerals
Incorporating fresh vegetables like spinach and tomatoes into the wraps provides valuable vitamins and minerals. Spinach is rich in iron and vitamins A, C, and K, while tomatoes offer antioxidants like lycopene, which are beneficial for heart health. Together, these ingredients contribute to a balanced meal that supports overall well-being.
Balancing Indulgence with Health
While Cheesy Garlic Chicken Wraps are undeniably indulgent, they can still fit into a balanced diet. Here are some tips on how to enjoy this dish mindfully:
– Portion Control: Keeping an eye on portion sizes is key. Enjoy one or two wraps, accompanied by a fresh salad or vegetable sticks, to create a satisfying yet balanced meal.
– Smart Ingredient Choices: Consider using whole wheat or spinach wraps as a healthier alternative to traditional flour tortillas. This small switch increases fiber content and adds nutritional value.
– Load Up on Veggies: The more vegetables you incorporate into your wraps, the more nutrients you’re getting. Aim to fill at least half your wrap with veggies for a color-packed, nutritious bite.
Conclusion
Cheesy Garlic Chicken Wraps are not only a deliciously satisfying meal but also a versatile option for various occasions. Whether you’re preparing a quick lunch, a casual dinner, or a gathering with friends, these wraps can easily fit into your culinary repertoire. The combination of tender chicken, gooey cheese, and fresh vegetables creates a balance of flavors that’s hard to resist.
As you experiment with different fillings, toppings, and dipping sauces, you’ll find new favorites that cater to your taste. Remember to enjoy the process of making these wraps, as it’s as rewarding as savoring the final product. With each bite, you’ll appreciate the convenience and deliciousness that Cheesy Garlic Chicken Wraps have to offer. So gather your ingredients, get creative, and make this recipe a staple in your home kitchen.
